CodeV

6.14-构建椭圆渐变叠加

围绕椭圆路径的渐变光泽叠加提供了另一种引入光和深度的方式。 这些类似于您在清单6-11和6-12中阅读的按钮光泽。 图6-23显示了添加这种光泽的示例。
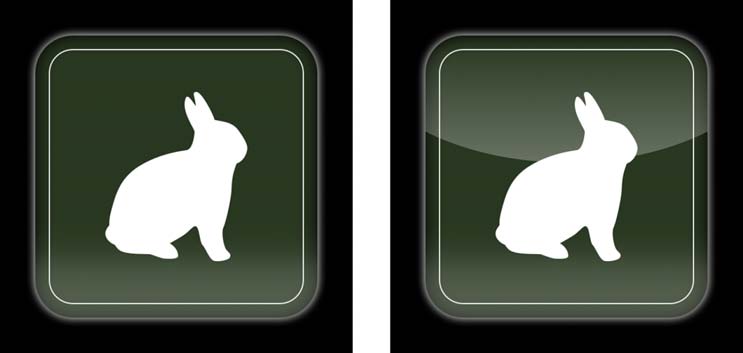
图6-23

图6-23绘制椭圆光泽。

底层算法很简单,如清单6-14所示:您构建一个与源路径高度相同的椭圆。 将其宽度拉伸到任一侧。 然后将椭圆向上移动,通常移动到距离顶部边缘45%(的位置)。

在绘制之前,将上下文剪切到原始路径和椭圆的交点。 两个addClip命令处理此请求。 最后,从路径的顶部到椭圆的底部绘制一个从透明到白的渐变。

清单6-14绘制顶部闪耀

1
2
3
4
5
6
7
8
9
10
11
12
13
14
15
16
17
18
19
20
21
22
23
24
25
26
27
28
29
30
31
32
33
34
35
void DrawIconTopLight(UIBezierPath *path, CGFloat p)
{
if (!path) COMPLAIN_AND_BAIL(
@"Path cannot be nil", nil);
CGContextRef context = UIGraphicsGetCurrentContext();
if (context == NULL) COMPLAIN_AND_BAIL(
@"No context to draw into", nil);

// Establish an ellipse and move it up to cover just
// p percent of the parent path
CGFloat percent = 1.0f - p;
CGRect rect = path.bounds;
CGRect offset = rect;
offset.origin.y -= percent * offset.size.height;
offset = CGRectInset(offset,
-offset.size.width * 0.3f, 0);

// Build an oval path
UIBezierPath *ovalPath = [UIBezierPath
bezierPathWithOvalInRect:offset];
Gradient *gradient = [Gradient
gradientFrom:WHITE_LEVEL(1, 0.0)
to:WHITE_LEVEL(1, 0.5)];

PushDraw(^{
[path addClip];
[ovalPath addClip];

// Draw gradient
CGPoint p1 = RectGetPointAtPercents(rect, 0.5, 0.0);
CGPoint p2 = RectGetPointAtPercents(
ovalPath.bounds, 0.5, 1.0);
[gradient drawFrom:p1 toPoint:p2];
});
}

本文翻译自《iOS Drawing Practical UIKit Solutions》作者:Erica Sadun,翻译:Cheng Dong。如果觉得本书不错请购买支持正版:亚马逊购买传送门,本书所有源代码可在GitHub上下载。译者虽然力求做到信,达,雅,但是由于时间仓促加之译者水平十分有限,文中难免会出现不正确,不准确,词不达意,难于理解的地方,还望各位批评指正,共同进步,谢谢。转载请注明出处。